Wednesday, December 15, 2010
Monday, November 15, 2010
Monday, November 8, 2010
Friday, October 29, 2010
Question
What is the first thing Mr. Tonn said to always do first when you open your photo in photoshop?
a) crop
b) levels
c) color balance
d) contrast
a) crop
b) levels
c) color balance
d) contrast
Wednesday, October 27, 2010
Photoshop Make Over
In this photo, I changed the levels and brightness before changing it into monochrome. Once it was in monochrome I moved the color sliders around till I had the right brightness. Now that the brightness was right I made sure that the back ground didn't have any lines or spots that would take your eye away from the person. Once I finished that I used the healing tool to get rid to any noticeable imperfections. Once all of the imperfections were gone, I duplicated the layer and on the new layer I used the surface blur, I erased the surface blur on her; eyes, mouth, hair, nose, and her sweater. The reason that I erased the surface blur in certain areas was so that those areas were sharp and clear, but her skin still stayed slightly blurred just enough so that her skin looked really nice.
Wednesday, October 20, 2010
Photoshop Makeover
In this photo of brianna, I changed the levels and brightness before changing it into monochrome. Once it was in monochrome I moved the color sliders around till I had the right brightness. Now that the brightness was right I made sure that the back ground didn't have any lines or spots that would take your eye away from brianna. Once I finished that I used the healing tool to get rid to any noticeable imperfections. Once all of the imperfections were gone, I duplicated the layer and on the new layer I used the surface blur, I erased the surface blur on her; eyes, mouth, hair, nose, and her sweater. The reason that I erased the surface blur in certain areas was so that those areas were sharp and clear, but her skin still stayed slightly blurred just enough so that her skin looked really nice.
Thursday, October 14, 2010
"A" Assignment October 14
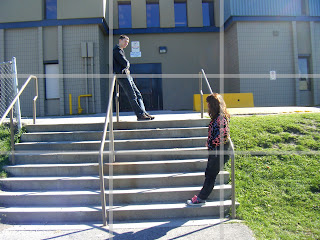
In this photo of karly, I changed; levels, color balance, and contrast. Once I finished the usual protocols I cropped out some of the sky and sides. When the photo was cropped I sharpened, dodged, burned, and saturated where the photo needed enhancing I darkened the sky slightly but not so that it looked fake, I also made Karly look a little lighter so she stood out more but still didn't look unnatual. Once all of the major changes were finished I made the photo grey, then added a hint of light brown. Now that the photo was in duotone I dudged and burned for the finishing touches.
Friday, October 1, 2010
Rule of Thirds October 1st
In these photos I used the Photoshop protocols to make enhancements where needed. After the protocols I put in two column marquees and two row marquees to divide the picture up into thirds horizontally and vertically.
Monday, September 20, 2010
Layers Landscape Monday September 20th
In this image I changed the levels, color and contrast check, crop, Unsharp mask, and dodged and burned certain areas that needed it. I created a second foreground layer and changed the levels, dodged and burned areas that had to be enhancing. After the work has been finished on the foreground and background I flattened the image.
Duotone Portrait Monday September 20th
In this photo I changed the levels, color balance, contrast, and Unsharp mask. After those changes I used the quick mask to blur out the back ground to make sure that your eye goes right to the main attraction. Finally I changed the mode of the picture to greyscale and made it dduotone of a light purple.
Leading Dynamic Lines Monday September 20th
In this photo I changed the levels, corrected the colors, brightened the contrast, dodged and burned where it needed enhancing. After the enhancing was finished I changed it into greyscale. After the photo was grey I made it duotone so that it had a hint of brown.
Subscribe to:
Comments (Atom)


